A great way to drink whiskey is on the rocks, which is a fancy way of saying with ice. However, although adding ice can improve your whiskey, it can also if you’re not careful, make it worse or even ruin it. That’s why I wrote this guide. So you can get all the benefits of drinking whiskey on the rocks or with ice, while at the same time avoiding all the potential problems.
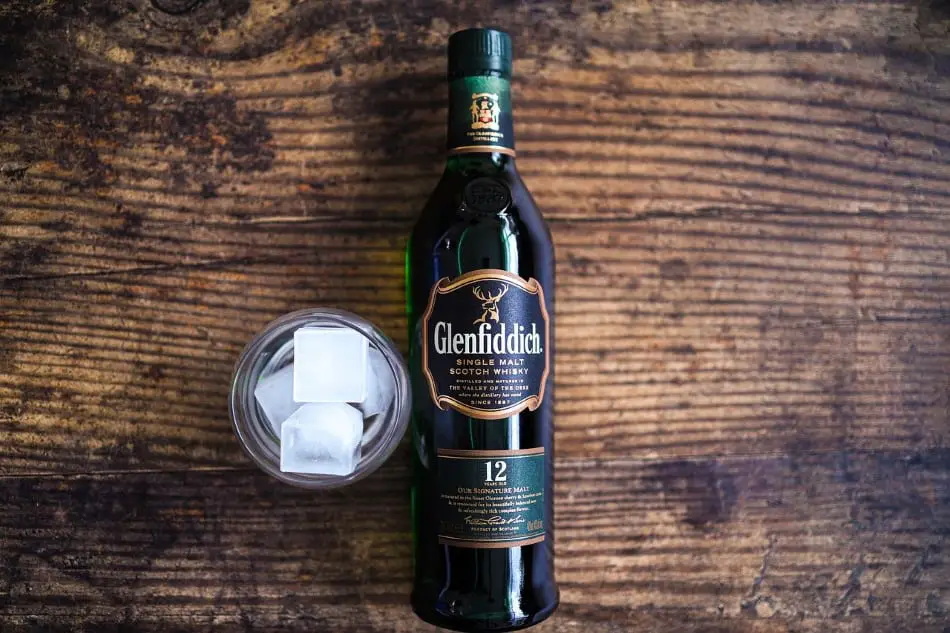
1. Use Large Ice Cubes That Have Few Impurities
It’s essential to use the right type of ice for drinking whiskey on the rocks. And the right type of ice for that is:
- Large
- With as few impurities as possible
Large
You need to use large or giant ice cubes or spheres. That’s because one or two large ice cubes has less surface area than many smaller ice cubes with equal volume. (Large or giant ice spheres have less surface area than large or giant ice cubes of the same volume). This means that while the ice will melt, it will melt slower.
That’s important because one of the benefits of drinking whiskey with ice is that it lowers the temperature of the whiskey and reduces the burn of the alcohol. However, lower temperatures prevent flavor molecules from evaporating, so you don’t want your whiskey to become too cold as that will mute its aromas and flavors. Slowly melting ice cubes ensures that your whiskey won’t get too cold too quickly.
The other benefit of drinking whiskey with ice is that as it melts its water is added to the whiskey which opens up its flavors. This is a continuous process, and you can taste all the changes in your whiskey as more ice melts and more of the whiskey’s flavors open up. However, you don’t want this to happen too quickly, or you’ll miss all the flavor changes and end up with a whiskey that’s diluted to the point where it’s lost its flavors. Slowly melting ice cubes make this less likely.
With as Few Impurities as Possible
You also need to ensure that your ice doesn’t ruin your whiskey by contaminating it. That’s why it should be made from clean water that has as few impurities as possible. Tap water is often good enough provided it doesn’t have a distinctive taste. If your tap water is not good enough then you’ll need to use bottled or filtered water.
When freezing ice, it’s best to use a cooler or special ice molds that are insulated at the bottom so that the ice freezes from the top down and not from all sides at once as they do in regular ice molds. Since the purest water freezes first, the top layer will be clear and free of impurities which will all be in the cloudy bottom layer.
Finally, since ice is porous you need to ensure that it doesn’t absorb any unpleasant smells or flavors from the things around it and transfer them to your whiskey. So when storing your ice cubes in the freezer, make sure to put them in an airtight container or sealed zip lock bag. And use newer ice cubes rather than older ones as they have had less time to absorb smells and flavors from the things around them.

For more information on what ice to use for whiskey, see this more detailed article I wrote about it here.
2. Get Hold of a Whiskey Tumbler
When drinking whiskey on the rocks or with ice you need to use a tumbler and not a nosing glass. The difference between these two types of whiskey glasses is:
- Nosing glasses are tall-ish with a wide bowl, long narrow neck, thin stem and pedestal.
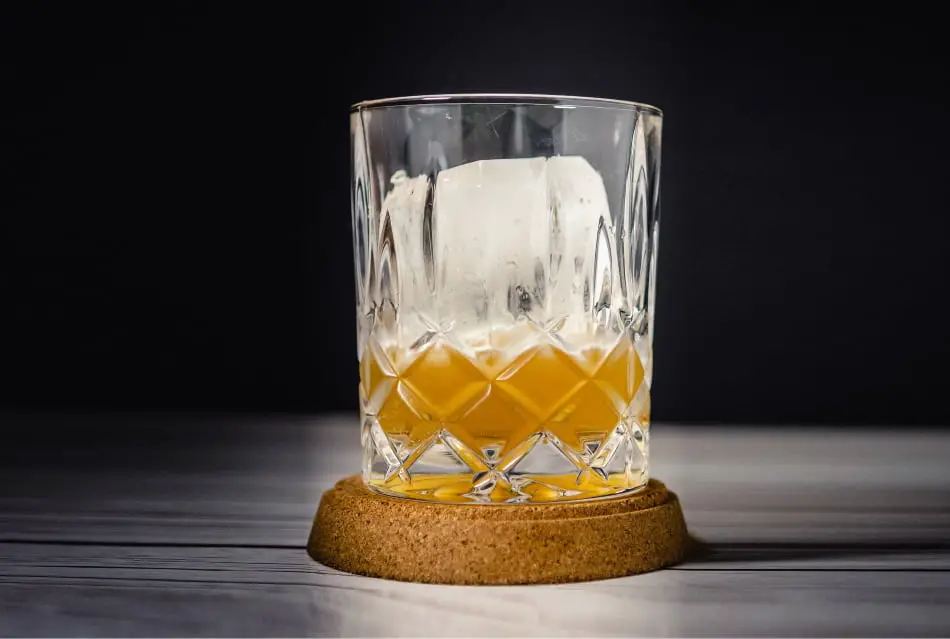
- Tumblers are short and wide with straight sides, a thick or heavy flat bottom and no stem or handle.
There are three reasons why you should use tumblers when drinking whiskey with ice and not nosing glasses. The first is because the thicker sides and bottom of tumblers make them stronger than nosing glasses which are more delicate and fragile. Ice cubes shouldn’t break or scratch whiskey tumblers, but they might damage nosing glasses.
The second reason for using a whiskey tumbler is because they have a wider opening than nosing glasses. Since for the above-mentioned reasons, you need to use larger ice cubes, you’ll also need to use a glass with an opening that’s large enough for them to fit through. Large ice cubes won’t fit through the narrow opening of nosing glasses.
Finally, you need to use a tumbler when drinking whiskey with ice because their thicker sides insulate the contents of the glass from the heat coming from your hand or the surface on which the glass is resting and prevents it from melting the ice quicker and causing the above-mentioned problems.
Nosing glasses are usually held by their stem which also prevents the transfer of heat from your hand, but their sides are much thinner, so the contents of the glass will heat up quicker if you hold them incorrectly.
3. Pour 2fl oz of Whiskey
When drinking whiskey on the rocks or with ice, the point is not to get drunk (for which several 1 or 1.5fl oz shots would be enough) but to have a more substantial drink whose aromas and flavors you can explore and enjoy over four or five sips. That’s why a normal amount to pour when drinking whiskey with ice is 2fl oz.
This is an approximate amount. You don’t have to measure this out precisely and you can always use the two fingers rule which just means pouring until you reach the height of the width of two fingers held horizontally against a regular sized glass (the width of one finger against a regular sized glass is about 1fl oz).
4. Add Ice and Wait A Few Minutes for It to Melt
It only takes a few minutes for ice cubes to start making your drink colder, but you’ll probably want to wait 5 – 10 minutes for your whiskey to become cold enough that the burn of the alcohol is reduced, and the ice starts to melt and add water to your drink. The amount of time will depend on the exact size of your ice cubes, the temperature of the surrounding environment and your personal preference, so this will need some experimentation.
Be careful not to wait too long. Even though larger ice cubes melt and change the flavors of your whiskey slower, they still melt and change the flavors of your whiskey, and if you wait for too long you can miss some of it.
5. Smell The Whiskey to Detect Its Aromas
Now that the ice has reduced the impact of the alcohol and opened up the flavors of your whiskey, it’s time to smell its aromas. This is important because flavor is taste as well as smell, so you need to pick up as many of the whiskey’s aromas as you can if you want to taste all of its flavors.
However, this is not so simple due to the fact that you’re (necessarily) using a whiskey tumbler. The wide opening of whiskey tumblers leaves plenty of space for you put large ice cubes in, but it also leaves plenty of space for the whiskey aromas to escape. That’s why when drinking whiskey without ice you use a nosing glass, as the whiskey’s aromas can accumulate in their long narrow neck and won’t dissipate.
Nevertheless, some whiskey aromas do accumulate in whiskey tumblers, so it’s worthwhile spending time trying to detect them.
Put your nose into the glass and breathe in deeply but gently – whiskey has a high ABV and you don’t want to burn your (delicate) olfactory system. Open your mouth slightly as you inhale to let the alcohol fumes escape and the whiskey aromas circulate round so you can better detect them.
You’ll probably get an overpowering sense of alcohol at first, but as your nose gradually acclimatizes to it, each sniff will pick up more and more of your whiskey’s aromas. Take your nose out of the glass between each sniff.
Some tips for nosing whiskey are:
- Sniff using one nostril and then the other. Generally, one nostril is obstructed (this changes every 2 – 3 hours) so each nostril will perceive the aromas differently.
- Vary your rate of inhalation because some aromas are easier to detect when the flow of air is quicker while others are easier to detect when the flow of air is slower.
- Examine every part of the glass because different aromas concentrate at different levels of the glass.
6. Sip and Chew the Whiskey to Taste Its Flavors
Once you’ve finished nosing your whiskey take a sip and chew it – this means holding it in your mouth and swirling it around, making sure it spreads throughout your mouth and covers all the surfaces of your tongue. This is important because different parts of your tongue respond to different flavors.
After you swallow, take a deep breath and exhale through your nose so that the aromatic molecules in your mouth go to the back of your throat and rise up into your sinuses.
Before you take another sip, wait a moment so that the taste can come back up. This is called the finish. It can be short, medium or long, with some or all of the flavors you already tasted and occasionally even new ones. It will change as the flavors fade in your mouth.
7. Pause Between Sips for The Ice to Melt
As mentioned, one of the points of drinking whiskey on the rocks or with ice is to taste all the flavor changes as the ice melts and the added water opens up more of your whiskey’s flavors. You need to pause between sips so the slowly melting ice can do its job.
How long to wait between each sip will vary from whiskey to whiskey and person to person, so once again you’ll need to experiment to discover how long it will take for the melting ice to change the flavor of a particular whiskey.
After each pause for the ice to melt, you’ll need to smell and taste your whiskey again to see what new aromas and flavors have turned up.
Good luck.